

Mesh slice
I loved playing Metal Gear Rising on my PS3 and when revisiting it I was fascinated by the blade mode feature which allowed you to cut objects into a million pieces so I went about recreating it.
It is a realtime mesh slicing system built in C++ for Unreal Engine 5. Every triangle in a static mesh is classified against a cutting plane, with straddling triangles split at their crossing edges using barycentric interpolation to preserve UVs, normals, and tangents. A convex hull algorithm seals each cut with a generated cap face carrying its own material. Each fragment is a fully independent actor that can be sliced again indefinitely, with physics simulation and opposing impulse applied on separation. Integrated into a blade mode combat system with slow-motion and plane-based hit detection.
Technical break down
Here I will breakdown how exactly I created this system:
The Big Picture
When you slash an object, the system reads every triangle in the mesh, figures out which side of the cutting plane each one sits on, splits the triangles that straddle the plane, generates a new face to seal the cut, and writes two independent meshes as output. Here's each step in detail.
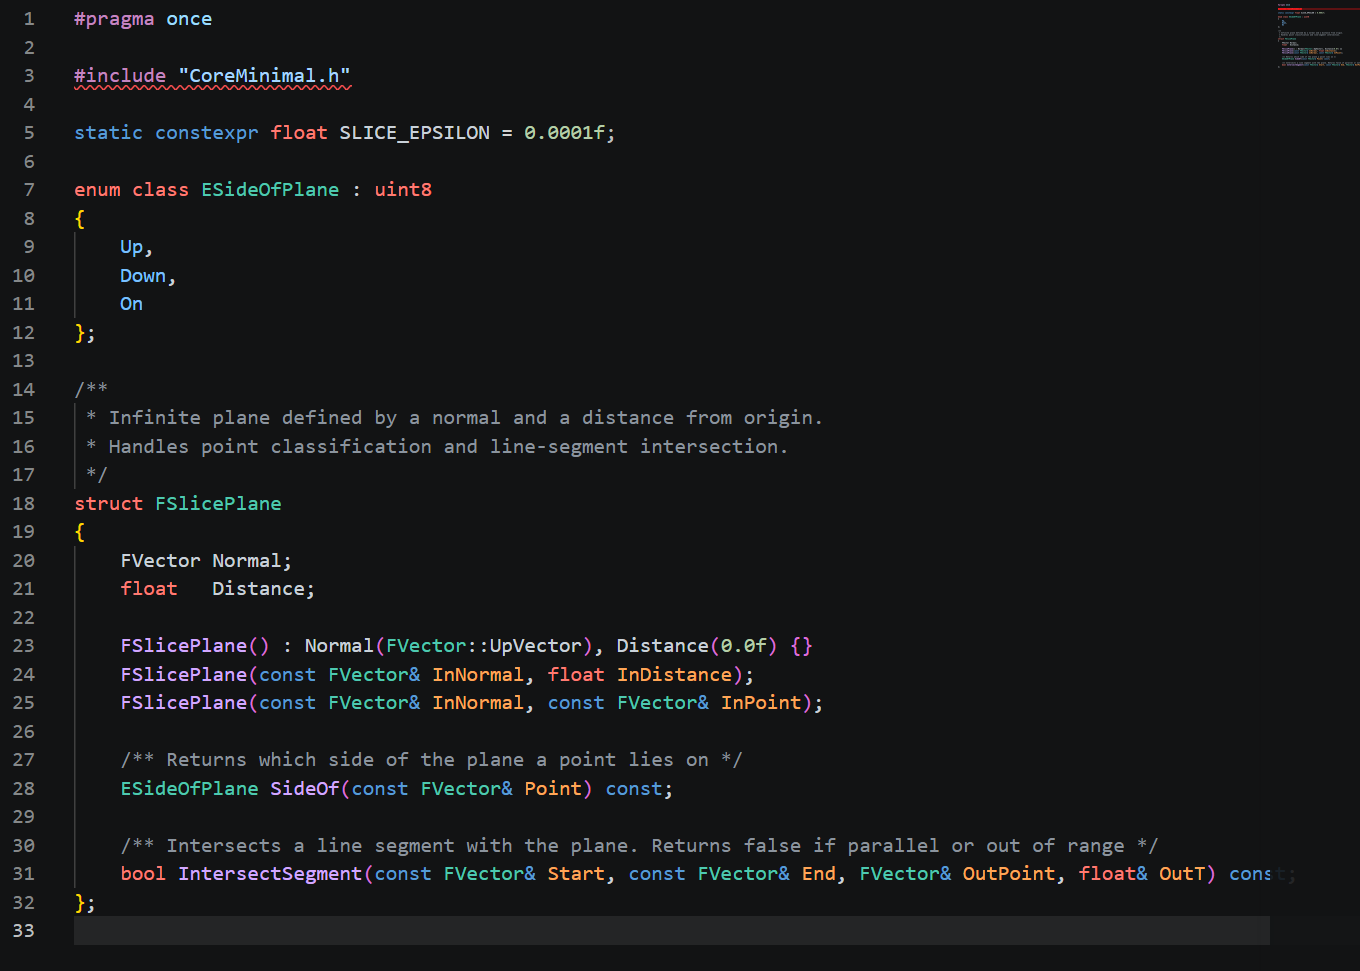
Step 1 — Representing the Cut (SlicePlane)
A cutting plane is defined by two things: a normal (which direction it faces) and a distance from the world origin. Any point in space can be classified against it by computing the dot product of the normal with the point's position and comparing against the distance.
SlicePlane handles three things:
Classifying any point as Up, Down, or On the plane (within a small epsilon to avoid floating point edge cases)
Finding where a line segment crosses the plane by solving for the parameter t how far along the segment the intersection occurs
Acting as the shared input that all other systems consume
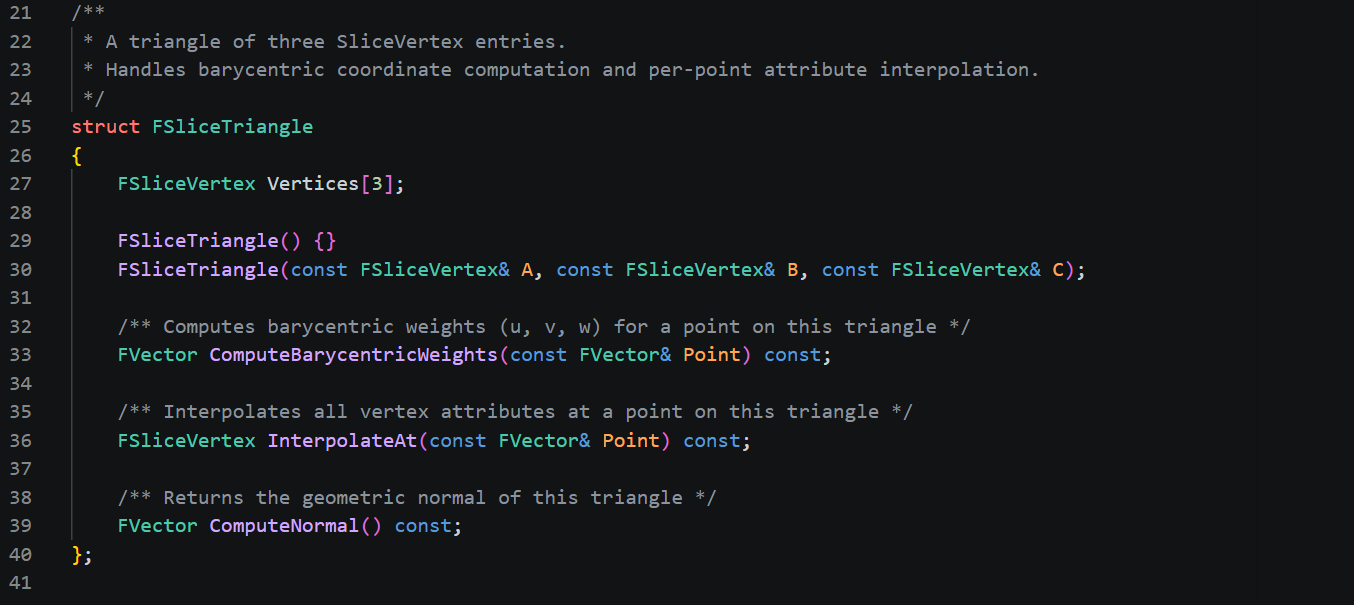
Step 2 — Storing Vertex Data (SliceTriangle)
A triangle isn't just positions - it carries UVs, normals, and tangents per vertex. SliceTriangle is a container for all of that, and it's what flows through the entire pipeline.
The critical method here is barycentric interpolation. When the plane cuts through a triangle and creates a new vertex at the crossing point, that vertex needs valid UVs, normals, and tangents — not just a position. The system projects the triangle onto its largest axis (X, Y, or Z) to compute barycentric weights, then uses those weights to blend all four attributes from the original three vertices. This is what keeps the texture seams and lighting correct at cut edges.
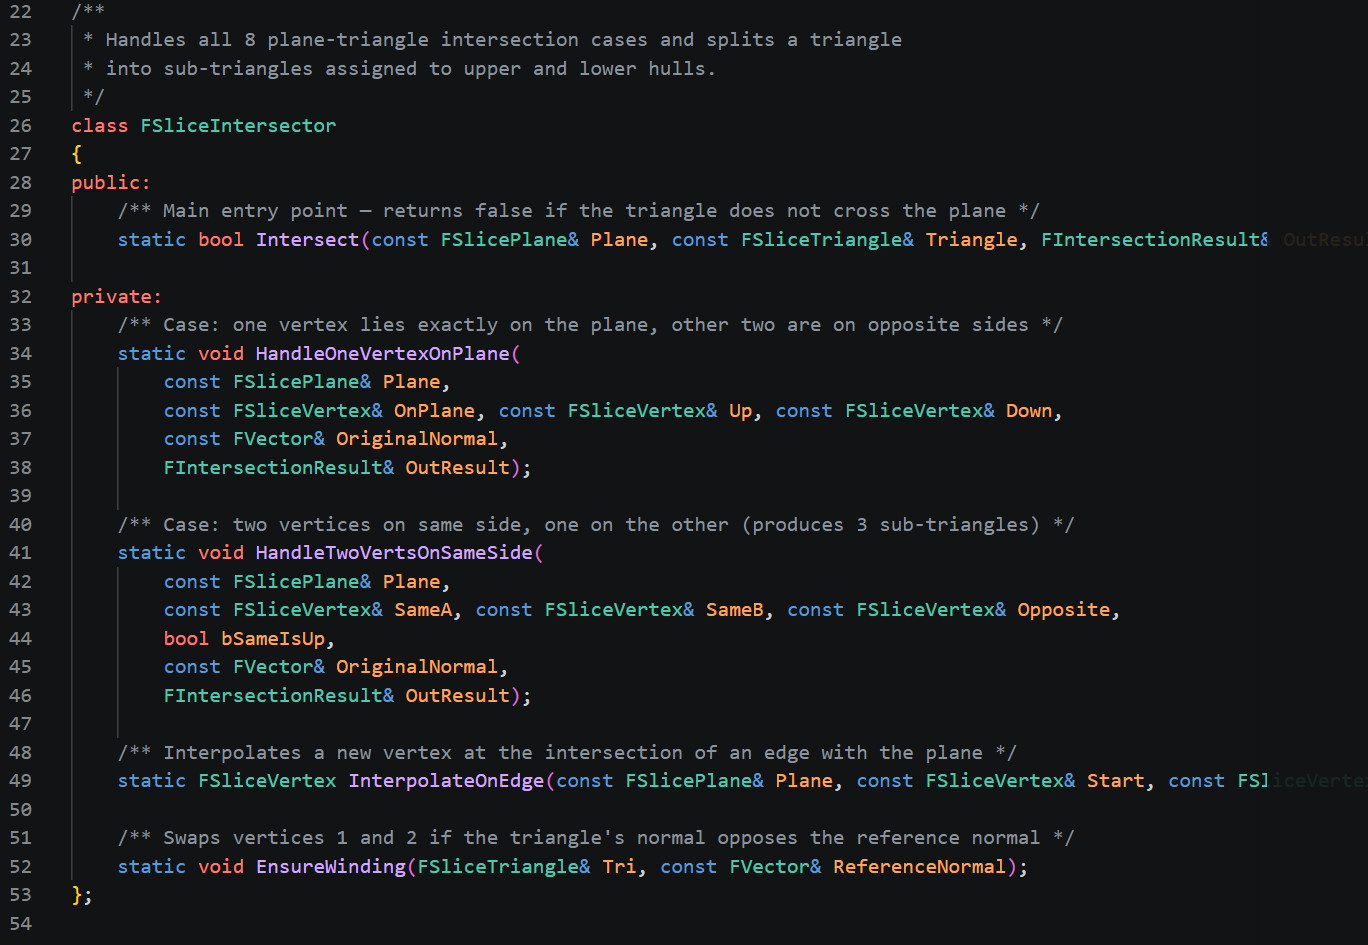
Step 3 — Splitting Triangles (SliceIntersector)
This is the core of the algorithm. For every triangle in the mesh, all three vertices are classified against the plane. There are eight possible combinations, which collapse into a handful of meaningful cases:
All on the same side → the triangle is untouched, routed to upper or lower output
Two vertices on one side, one on the other → the plane crosses two edges. Two intersection points are computed, and the triangle is split into three: two on the majority side, one on the minority side
One vertex exactly on the plane → the plane crosses one edge. The triangle splits into two
Two or more vertices on the plane → a degenerate parallel edge, skipped
After splitting, every output triangle has its winding order checked. The cross product of its edges is compared against the original triangle's normal — if they oppose each other, vertices are swapped. This keeps lighting correct on both halves.
All the crossing points (the positions where the plane intersects triangle edges) are collected into a list — these form the boundary of the cut, used in the next step.
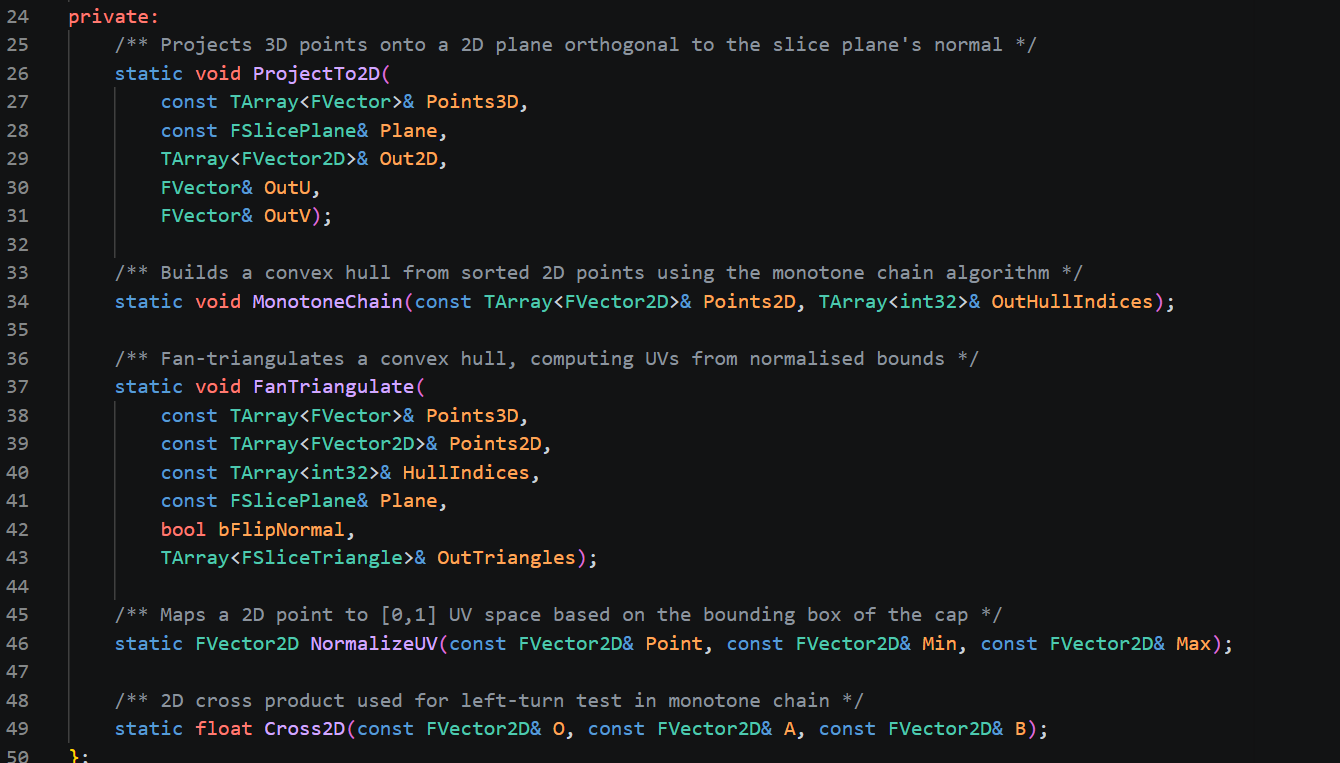
Step 4 — Sealing the Cut (SliceTriangulator)
The list of intersection points from Step 3 forms a rough cloud of positions all lying on the cut plane. To turn these into a solid cap face, the system:
Projects to 2D — builds an orthonormal frame from the plane normal (using UpVector or ForwardVector as the secondary axis), then projects every 3D intersection point into 2D coordinates on that frame
Runs monotone chain — a convex hull algorithm that sorts the points and builds lower and upper hull chains, producing an ordered loop of the outermost points
Fan triangulates — picks the first hull point as a pivot and fans triangles out to every subsequent edge along the hull
Assigns UVs — normalises each point's 2D position within the hull's bounding box to produce [0,1] UVs for the cap material
Generates two caps — upper cap uses the plane normal as its face normal, lower cap reverses winding so both faces point outward
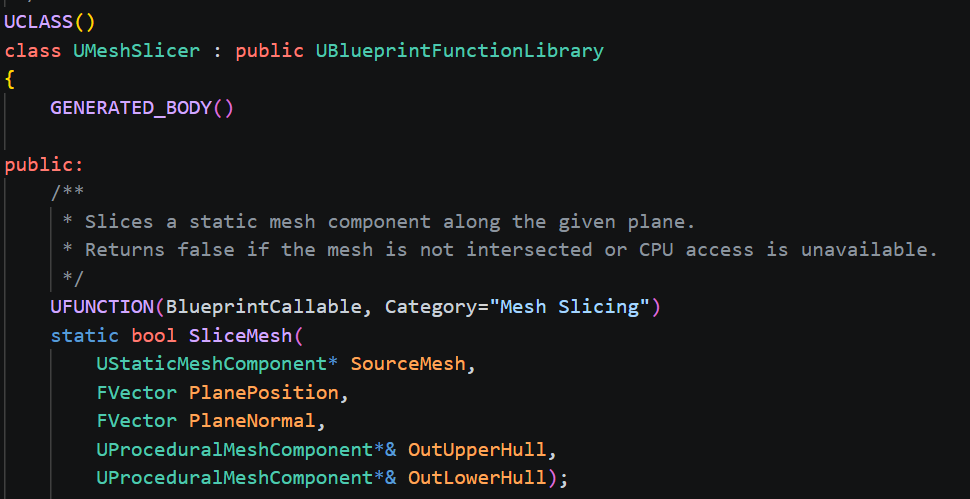
Step 5 — Building the Output Meshes (MeshSlicer)
MeshSlicer is the orchestrator that wires all the above together. It:
Reads the source StaticMesh's raw vertex and index buffers (requires Allow CPU Access on the asset)
Keeps all vertices in local space — the cut plane is transformed into the mesh's local space rather than transforming every vertex into world space, which avoids a double-offset bug when writing to ProceduralMeshComponent
Runs the intersector over every triangle, collecting upper/lower body geometry and intersection points
Calls the triangulator to generate the cap faces
Writes everything into UProceduralMeshComponent as flat vertex/index arrays — section 0 for body geometry, section 1 for the cap face, so each can carry an independent material
Step 6 — The Game Actor (SliceableActor)
SliceableActor is the Blueprint-facing wrapper that makes this usable in a level. It manages:
First slice: reads geometry from the StaticMeshComponent and caches it. This is the only time the static mesh data is ever touched
Re-slicing: body and cap triangles are cached in separate arrays (CachedBodyTriangles / CachedCapTriangles) so that on a subsequent slice, old cap faces aren't accidentally routed into the body section and lose their cap material
Fragment spawning: two new ASliceableActor instances are spawned via GetClass() so Blueprint subclasses are preserved, each receiving their half of the geometry via InitFromTriangles
Physics setup: bUseComplexAsSimpleCollision is set to false before mesh sections are created, and SetCollisionConvexMeshes generates a simple convex hull from the body vertices — this is what allows Set Simulate Physics to work without Chaos throwing a ComplexAsSimple warning
Root swap: after InitFromTriangles, Mesh (the ProceduralMeshComponent) is promoted to root component so that when physics simulation moves it, the actor's transform follows — without this, re-slicing a fragment that had drifted due to gravity would spawn sub-fragments back at the original spawn location
OnSliced: a BlueprintImplementableEvent that fires just before the parent destroys itself, passing both fragment references and the world-space plane normal so Blueprint can apply opposing impulses

Full Flow Summary
Slash input
  → Box Overlap Actors        — find candidates in blade volume
  → Line Trace per actor      — get exact contact point as plane position
  → ASliceableActor::Slice()
      → ReadMeshData           — vertices in local space from StaticMesh (first slice only)
      → SplitTriangles         — classify + split every triangle, collect edge points
      → Triangulate            — convex hull + fan triangulation → cap geometry
      → SpawnActor × 2         — upper and lower fragments at current actor transform
      → InitFromTriangles      — build ProceduralMesh, set up physics, swap root
      → OnSliced               — Blueprint applies impulse, starts destroy timer
      → Destroy()              — original actor removed